Q & A

Should I Buy A Telephoto Lens Or Use A Teleconverter?

This post is a part of our Q&A section. If you want to submit your question, please use the form in the Contact page.

QA.jpg

Oliver (Auckland, New Zealand) asked: I like doing nature and wildlife photography and considering my options whether to buy telephoto lens or teleconverter. Please suggest what should I do?

Hello Oliver! If the budget is not an issue, getting telephoto lens for your need is the best choice by all means. If you are serious into sports photography or nature and specially wildlife photography, telephoto lens will make its way into your camera bag sooner or later. And if you can't afford good telephoto lens yet but have mid-range zoom lens, 70-200mm for example, your option is to get teleconverter and extend its range.

Why do we need a Telephoto Lens?

Telephoto lens is a specific type of long-focus lens and an essential tool to have if you are into wildlife photography and considering to make it your profession or serious hobby. You cannot always get closer to your subject and telephoto lens is the only way to capture them. But good telephoto lens comes with big price and might be bulky for some of us to carry around all day long. As of today, the most expensive and long range Nikon super-telephoto lens (AF-S NIKKOR 800mm f/5.6E FL ED VR) costs around $16,299.95 and weighs around 10.1 lbs (4.5 Kg) and mid-range telephoto lens (AF-S NIKKOR 200-400mm f/4G ED VR II) costs around $6,999.95 and weighs around 7.4 lbs (3.3 Kg). Not everyone needs and can afford these beasts but that doesn't mean we should give up.

What should we do then?

Nikon-Teleconverter.png

Where there is a will, there is a way, and, this is where teleconverter comes into our discussion. Teleconverter is a cheap way to extend your lens range from its normal range. As name suggests itself, teleconverter multiplies your lens range by its x factor. Let's say you have a 70-200mm lens with f/2.8 max aperture and you bought 2.0x teleconverter. Once you fit this teleconverter to your lens, it will extend range from 70-200mm to 140-400mm and reduces maximum aperture to f/5.6, by half, allowing only half amount of lights and hence slowing down the speed which might be crucial for wildlife photography specially for capturing birds and fast moving animals. If you were thinking little earlier why telephoto lenses were that much expensive when you can achieve the same range with cheaper teleconverter, you may now have the answer. Yes, it not only extends the zoom range by x factor but also decreases the aperture by same factor. So, if your goal is to get greater range with maximum aperture possible (to produce nice bokeh effect in the background and faster shutter speed) then you may have no choice but buy expensive telephoto lens. Sometimes you may be able to get nice blurry background even with smaller aperture if your focusing distance is greater because depth of field is affected by your distance to subject as well. Another disadvantage of using teleconverter is distortion effect. Your image might be little distorted because teleconverter adds different sets of glasses behind your lens adding an external components to the lens whereas telephoto lens is made up of same quality glasses incorporated inside single barrel to produce better result. Distortion might be little less noticeable or even unnoticeable if you use teleconverter from same manufacturer as your lens.

To summarize our discussion into points,

1. Telephoto lens can be heavy and expensive but it is the best option if the budget is not an issue and you do not want to compromise with quality of pictures.

2. Teleconverter is the best alternative and cheaper option to get extended range from your normal zoom lens.

3. Teleconverter extends the range of your lens but also decreases the max aperture by same factor and slow down your lens by allowing only half of the lights than the lens without the converter.

4. And that is why getting telephoto lens or using teleconverter depends on what you want to achieve and how much money you are willing to spend for it.

How Do I Force My Camera To Focus Into The Specific Place?

This post is a part of our Q&A section. If you want to submit your question, please use the form in the Contact page.

QA.jpg

Niran (Bangalore, India) asked: I have a Nikon D3100 and loving it so far. But, I have a concern regarding focus when I am taking pictures. When I try to focus, focus point keeps moving. How do I focus in the right place?

Niran, based on your question, it looks like you are using default Auto-area AF mode. I have covered similar topic for Nikon D90 earlier and same theory applies to you as well. In this mode, camera will pick the focus point automatically by selecting the object that is near to the camera sensor. If your camera moves during framing, it might pick up another spot for focusing. Your camera thinks that nearest object is the point of interest. When you press the shutter release button half way down, you will notice the focus point that camera is going to use lighting up in the viewfinder.

Nikon D3100 AF mode

Nikon D3100 AF mode

If it constantly picks the random focus point and not picking what you want to be in focus, then you have to manually pick the focus point. And to do that, you need to change the AF mode in your camera setting. The AF-Area Mode option is inside the Shooting Menu (shown in the left picture). If you go inside this menu, it lets you select between the Single-point, Dynamic Area, Auto Area AF and the 3D Tracking modes. Single Area AF simply means that the camera focuses on the subject in the selected focus point only. In this mode, user can manually select the AF point by using the up, down, right, or the left arrow directions on the multi-selector button, which is marked by number 24 in the picture below.

Nikon D3100 Multi-Selector

Nikon D3100 Multi-Selector

Later on, if you open the picture using Nikon View NX2, which comes free with Nikon DSLRs, you will find Focus Point button on the toolbar. If you press this button after opening the picture, the software will display the focus point that your camera used by displaying red square. It is useful tool to diagnose the problem if you think your camera is picking up wrong focus point.

I hope I was able to answer your question. But, if you have more questions, please do not hesitate to write us back.

Keep Shooting!

What Does Dragging The Shutter Mean And When Should We Use It?

This post is a part of our Q&A section. If you want to submit your question, please use the form in the Contact page.

QA.jpg

Ed (Colorado, USA) asked : I have heard the term "dragging the shutter" quite a few times from professional photographer. Do you mind explaining it with an example may be?

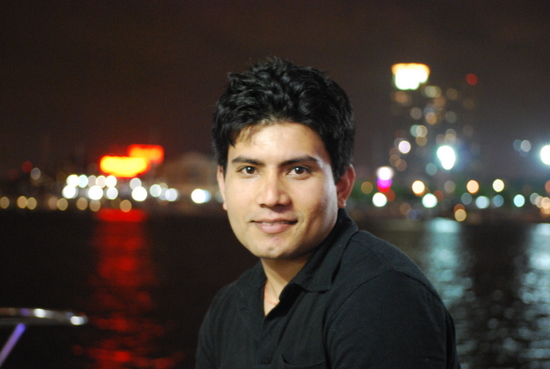
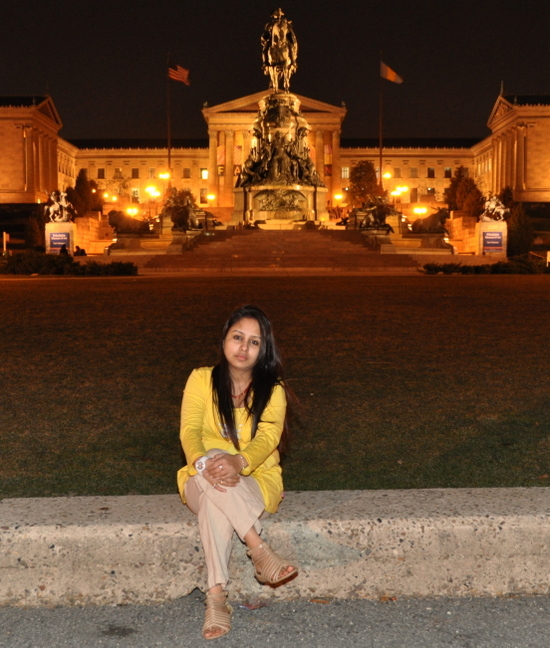
When you are shooting at night, you have to deal with different types of lights; flash light (if you are shooting a portrait), street lights and environmental lights. Sometimes you want to shoot without the background objects but there are times when you want to capture the beautiful background scene or nicely lit architecture along with your subject (portrait for example). If you have noticed latest point and shoot cameras or even some entry level DSLR cameras, there is a mode called "Night Portrait" mode which is basically an auto mode. If you turn your mode dial into Night Portrait mode, camera automatically manages the camera settings to capture the portrait along with the background lights. While using one of these auto modes, sometimes you get the good result but sometimes you may need more control over the exposure parameters or the flash mode to get more balanced result. If you want to control the lights and camera settings, you have to step up and dial into one of the semi-manual (S, A and P) or full manual (M) mode and set the parameters accordingly.

You might have used this technique before knowingly or unknowingly and you are just not familiar with the terminology which happens to all of us at some point. It is all about balancing flash and ambient light (light that exist in the environment). When balancing ambient light with flash light, photographers choose camera settings to retain the mood of place, time and environment of shooting. While doing so, we have to allow ambient light by allowing shutter to open little longer (dragging the shutter) and apply the flash light at the end of the exposure (usually to freeze the motion).

Dragging the shutter is very simple and also commonly used technique while doing night portrait photography. It is important to know whether you are using a Manual flash or a TTL flash setting with your camera. If you are using a Manual flash, usually Aperture, ISO, subject distance with the flash and the power of the flash affect flash exposure. Whereas ISO, Aperture and Shutter speed usually contribute to the ambient light exposure. That means you can use the Shutter speed independently to control ambient light exposure only because changing Aperture and ISO will also affect Manual flash exposure. The environmental light (also called ambient light) is continuous source of light but flash light is gone with the blink of an eye which is the main reason why we say Shutter speed doesn't contribute to the flash exposure.

But if you are using TTL flash, those four controls (Aperture, ISO, Distance and the Power) have no control over the flash exposure because your camera and the flash talk to each other based on the Aperture, ISO, distance to the subject and apply appropriate flash power to give the correct exposure. That means you can now use Aperture or ISO or Shutter speed to control ambient light without affecting flash exposure. Using TTL flash is relatively easy and you don't have to remember much while changing camera settings but if you are using Manual flash, you have to be very careful about what setting you have changed because if you change your Aperture, you have to change flash power or ISO or distance to compensate flash exposure but at the same time changing Aperture also affects ambient and hence you may have to adjust Shutter speed too. It's kind of confusing but enough practice clears confusion.

Night portrait

Night portrait

Shutter Speed : 1/60     Aperture : f/4     ISO : 220

Usually dragging the shutter slower than 1/60th of second allows you to register ambient light but you can change shutter speed as you need more and more ambient light. I usually use rear sync flash with slower shutter speed so that your final moment would be frozen.

Dragging the Shutter

Dragging the Shutter

Shutter Speed : 1/5     Aperture : f/4.2     ISO : 1600

Dragging the Shutter

Dragging the Shutter

Shutter Speed : 1/3     Aperture : f/4     ISO : 800

Baltimore-Inner-Harbor-Night-portrait.jpg

Shutter Speed : 1/5     Aperture : f/4     ISO : 1600

These images are taken with TTL flash and you can see how changing camera settings is adopted automatically by flash unit and applying appropriate power to properly expose the image.