Daily Photography Tips

Moving From Capture NX2 To Adobe Lightroom

If you are following my blog since it's early days, you probably know that I started my photography journey as a hobby with a Nikon D60 back in 2010. My choice of Nikon camera as a first DSLR was purely accidental. I was shopping for DSLR camera in my local Best Buy store where I came across Nikon brand, and having minimal knowledge about other DSLR brands during the purchase, I came home with the Nikon D60. Since then, I am shooting with Nikon camera. It took me few months to get familiar with different camera settings but after knowing how it works, I found it very easy to use and never thought of switching to another brand, not because I hated other brands but simply I started loving Nikon cameras, it's controls and settings and the wide varieties of lenses it offers. After playing with the D60 for a year, I upgraded to D90 and then after couple of years, I bought my first full frame DSLR, D700 (one of the best camera I ever owned), which I am still shooting with happily. But I think it's time to upgrade my D700 (to get more dynamic range and higher pixel in the image sensor) to either D750 or D810 which I haven't decided yet but I am leaning towards the D810 for few reasons which I will share with you once I pull the trigger. Initially, during my learning phase, I used to shoot only in a JPEG format but later when I discovered the advantage of shooting in a RAW format and post processing techniques, I started looking for good post processing software. After doing some research on the software and since I was already shooting with Nikon camera, I went with Nikon's image editing software, Capture NX2. It was a good choice and working great and most importantly, I was very happy with it until Nikon pulled the plug and announced that they are not going to update the software anymore and released their newer editing software, Capture NX-D, instead. I never tried using Capture NX-D (I was kind of mad with the Nikon) and still use Capture NX2 to edit my pictures. But since I am thinking to upgrade my camera, Capture NX2 wouldn't be able to process the RAW images from new DSLRs since it doesn't recognize the image format (thanks to Nikon). I had no choice but look for alternatives and thought of giving a try to Adobe Lightroom which is probably the most popular image editing software in the current market.

I downloaded a 7 days free trial version of an Adobe Lightroom and started playing with it. Among many other features, I loved how it handles the creation of an HDR (High Dynamic Range) image. Capture NX2 couldn't create an HDR image out of multiple exposure shots by itself. If I wanted to create an HDR image, either I had to use an HDR Efex pro from Google Nik Collection and then export the TIFF file and import it back to Capture NX2 for further processing or use other third party HDR processing tools. Since I would like to keep things simple and make life easier, I was looking for one stop solution to edit RAW images and create an HDR image out of multiple bracketed shots as well if I ever wanted to. When I discovered that the latest Adobe Lightroom does both effectively, first thing I wanted to try was to create an HDR image with it. The process was very easy; import all the multi exposure files into the lightroom and then right click those files to merge them into an HDR (it also had an option to merge into Panorama if you want to create a panoramic image using multiple shots). And to be honest, I got really impressed with all the tools it provides for color controls, image sharpening, dealing with noises, lens error corrections and various other touch up tools.

Here is a single shot of Boston downtown (non HDR version) which I took few years ago and processed using Capture NX2. If you want to see the camera settings I used for this shot, please read my earlier blog post about Setup I used for Night Cityscape Shots 

Boston Downtown (click the image to view full size)

And here is an HDR version of same shot created in a Lightroom by combining five exposure shots (-2 EV, -1 EV, 0 EV, +1 EV and +2 EV). After creating an HDR image, I also added some color tones to highlight some of the image area, sky for example. You can see more range of colors and visible clouds in an HDR version whereas those details were lost in a single exposure shot (above).

Boston Downtown HDR (click the image to view full size)

The beauty of the Lightroom is that while creating an HDR image, it creates a DNG (Digital Negative) file which is also non-destructive RAW file and you can edit it further if you want to adjust more color tones or any other settings you like.

I am not writing this blog to favor one software over another but after using Capture NX2 for little over five years, I think Adobe Lightroom came out as the best alternative for me. If you are already using Lightroom or any other image editing software, please share your experience in the comment section below.

Happy Shooting!

Do Not Use Cropping As An Excuse

Cropping is an editing skill that has always been an important part of photography. It was widely used during the days of black-and-white photography and is now considered as an integral part of digital photography. Even though your frame is well composed during shooting, sometimes technical adjustments demands cropping. In digital photography, cropping gives you the power of reworking on your composition well after it has been shot. Modern editing tools come with cropping option loaded with presets of different composition techniques, rule of third for example. It gives you an option for deferring design decisions, and even let you explore new ways of organizing the photograph.

When you do stitching, you are combining more than one shot to make a larger image but during cropping, you are actually reducing the size of the image. This is very important point to remember if you are planning to crop your image later during post processing because cropping demands your original picture to be in high resolution if you do not want to loose the details in larger printing.

It is very common for the wildlife photographer to shoot very high resolution picture and later crop it to highlight the important part of the shot, eagle catching a fish or the head-shot of the bald eagle for example. Cropping is also being widely used to magnify the moon shot and most of the time it has nothing to do with the composition.

With the use of computer and advanced software, cropping process is becoming very easier and clearer. However, it is very important not to think of cropping as an excuse for not composing well at the time of shooting. You shouldn't let the cropping tool to become a habit of not being decisive about the composition during the shooting. The danger of creating such habit is that you start thinking that you can perform a significant proportion of photography on the computer and it introduces an interruption in the process of making a photograph.


How To Photograph Fireworks

It is that time of the year again when we all get excited to capture the 4th of July fireworks. Capturing a stunning fireworks is an art work and an experimental fun at the same time. I think it is a new experience every time no matter how many times you have done it before. Sometimes, we get the perfect location and our camera settings work perfect but sometimes things won't turn out the way we want them to. But, no matter what, at least for me, when I go to shoot fireworks, it is always an exciting moment whatever the outcome would be. The moment of a celebration, meeting varieties of people and sharing our experiences with each other is another attraction of this event. Also, fireworks is probably one of the best form of an outdoor entertainment as well.

Before Fireworks

Before Fireworks

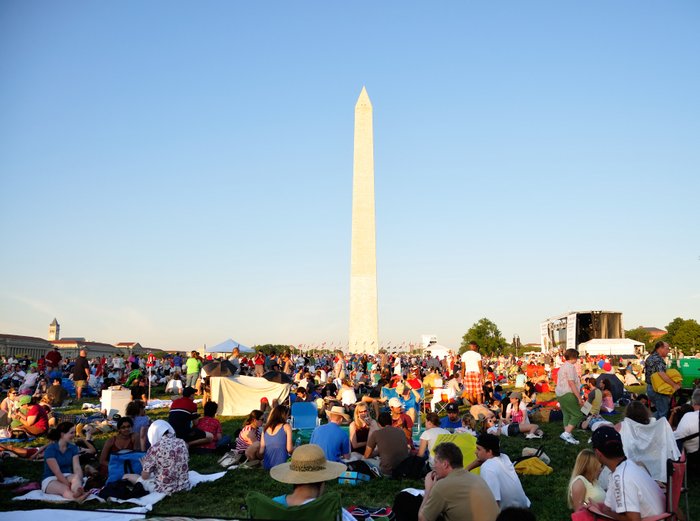
It is very important to reach the fireworks area at least 30 minutes to an hour prior so that you can choose the best location possible to view the fireworks and setup your camera on the tripod. You don't want to sit too close to the fireworks because of the smoke coming out of the fireworks. It does not look pretty getting those cloudy smoke in the frame (sometimes you can't avoid them during a shooting but you can edit them out during post processing). Also, if you are too close to the fireworks, it will get difficult to balance the exposure and you might need a wide angle lens to cover the shots as well. And, you don't want to go too far either, otherwise you will end up missing lots of details. You want to get a clear fireworks shot with the clear dark background.

I am trying to cover everything about shooting fireworks that I have learned over the years and divided this blog into two sections; basic hardware you need along with your camera and the camera settings for the fireworks.

Taking-fireworks-picture.jpg

First, let's discuss about some of the hardware you need to shoot fireworks.

1. Camera and Lens Camera : For the best results, you might want to use a camera that has a Manual mode. The reason is, you can't control what parameters camera will select in an Automatic mode. In a Manual mode, you can adjust an Aperture, Shutter speed, ISO and many other factors to control your exposure in a given shooting environment.

Lens : I suggest mid-range zoom telephoto lens for the fireworks since you can zoom in and zoom out depending on your location and distance to the fireworks. My personal favorite is 18-200 mm f/3.5-5.6G VR II (if you are using a DX format DSLR) and 70-200 mm f/2.8G VR II (if you are using an FX format DSLR).

2. Tripod If you are planning to shoot fireworks without a tripod, you are probably wasting your time. If you want to get a crisp image, you can't shoot fireworks without using a tripod. Since we are shooting with a low ISO to avoid any possible noise and using 2 to 5 seconds of exposure time (shutter speed), we will get a blurry image shooting handheld. That's why it is probably the best idea to get a sturdy tripod that supports the weight of your camera body along with the lens. I use Manfrotto 055XPROB Pro tripod with a Manfrotto 498RC2 ball head.

3. Remote shutter release While shooting fireworks, you want to prevent your camera from any kind of shaking or vibration. Using a camera on a tripod definitely makes it stable for a long exposure shot and using a remote shutter release helps to avoid any camera shake while pressing the shutter release button. I use remote shutter release cable for this purpose. You may be able to use wireless shutter release if your camera supports it but I am not sure how easy will it be to use it at night and specially when you are in the crowd.

July 4th Fireworks

July 4th Fireworks

Now, after getting all the hardware together, let's discuss about the Camera Settings to get the best result possible. These are guidelines and not the hard and fast rules.

1. Turn your camera Mode dial into a Manual Mode (M). As you already know, Manual mode allows us to pick our own settings for ISO, Shutter speed and Aperture and adjust them individually to set the correct exposure.

2. To start with, set the Shutter speed between 2 to 5 seconds and an aperture between f11 to f14 to achieve deep depth of field. Combination of a slower shutter speed and a smaller aperture (larger f value) let the camera sensor to collect more lights, maintain a sharp focus throughout the frame and produce the trail of lights forming a beautiful fireworks.

3. I recommend using a Manual focus when you are shooting long distance subject (that is moving fast as well) in a low light condition. The reason is, camera's Autofocus system may not be able to track the subject accurately (every time) and lock the exposure to activate the shutter release button. For few initial shots, you can activate the camera's Autofocus system by pressing the shutter release button halfway down (lens should be in Autofocus mode) and once you get the clear focus, switch the focusing mode into a manual mode so that your camera doesn't need to track the fireworks and re-focus it every time it is fired which might slow down the capturing process. If you change the focal length (zoom in or zoom out) of your lens, you have to repeat this procedure again to get the fireworks in focus.

How-to-photograph-fireworks.jpg

4. If you do not have a remote shutter release option available at the moment, you can apply this little trick to avoid any camera shake: set the shutter release option into self timer mode and set the timer into 2 seconds. That will trigger the shutter release button only after 2 seconds of pressing it and avoid any potential camera shake. But you have to be careful with the timing of pressing the shutter release button and firing of the fireworks. Otherwise you could miss the good shots.

5. Turn the Auto ISO off and shoot with minimum ISO possible, ISO 100 for example, to reduce any digital noise. When you shoot with an Auto ISO mode on, camera may bump up ISO value to compensate the low light condition and produce grainy noise in your picture.

6. You can turn off Image Stabilization (IS) or Vibration Reduction (VR) feature on your lens while shooting on a tripod. Turning it off also reduces the amount of moving parts inside the lens and makes capturing process much faster.

How-To-Shoot-Fireworks.jpg

7. While shooting fireworks, I recommend shooting in a RAW mode rather than a JPEG mode. That way you can always touch up later to remove any smoke or other distractions from your photographs.

8. Set the White balance into Auto mode. It works well most of the times and even if it doesn't, you can always change it during the post processing if you shoot in a RAW mode (another reason to shoot RAW).

9. And, you want to switch off your camera flash if you haven't already.

Take a few shots with the suggested camera settings and see how it works for you. If the image is too bright or too dark, adjust your shutter speed or aperture settings. It gets tricky during the end of the show when they tend to finish up with the rapid fire and you may end up getting over exposed photograph if you do not adjust your exposure settings accordingly. Personally, I would like to set an Aperture value into a large number (small aperture) and keep it fixed and only adjust the Shutter speed to a different value to control the ambient light. That way, you get the deep depth of field keeping everything in focus and also it will be much easier and faster just to adjust the shutter speed using the command dial depending on whether you are over exposed or under exposed. But you also have to be careful not to open the shutter for too long which might capture a longer action making your fireworks look blurry. You can also try the BULB mode (if available in your camera) and time the closing of the shutter as soon as the explosion ends so that you won't get any smoke into your frame. When using the BULB mode, you can use your cellphone timer to time the exposure.

How-to-take-Fireworks-shot.jpg

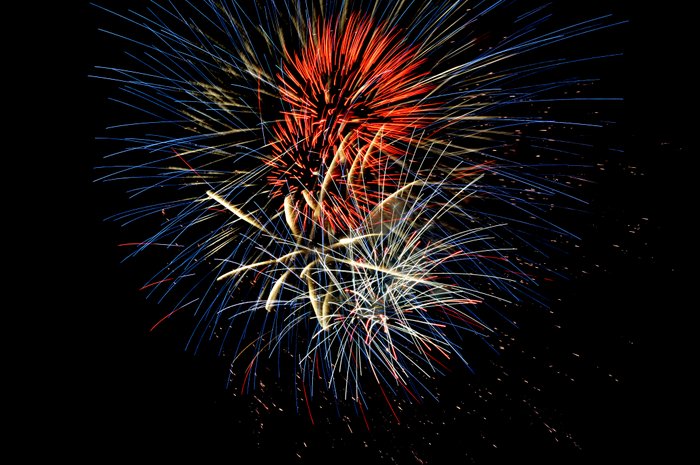
Focal Length - 27mm     Aperture - f/20     Exposure - 4 sec     ISO - 200

After taking few shots with the recommended settings, you can always experiment with it and be creative with your shots. More you shoot, more creative you will become and minimize the chance of getting errors and making mistakes. Learning from our mistakes and not to repeat it again is the key for success. Do not hesitate to grab your camera and do some experiments with it on this upcoming July 4th fireworks.

Happy 4th of July everyone and Happy Shooting!